Product Description
1
Products
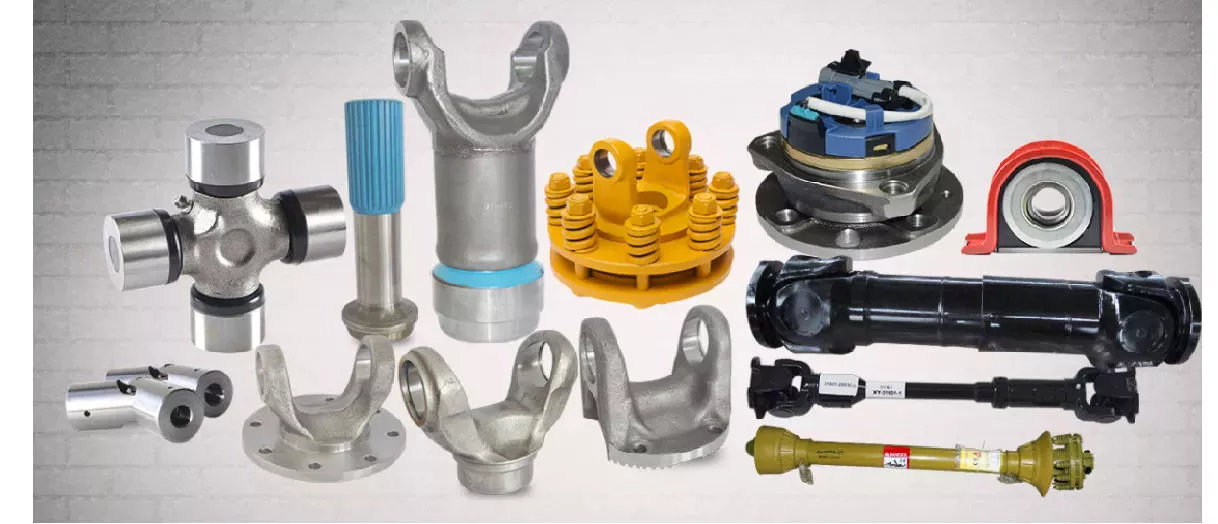
Name: Made in china hot die forging alloy steel farm machinery parts rear axle wheel hub
Material: 40CrMo
Weight: From .2kg-10kg
Packing: standard export packing
Min order: 100pcs
Customized production is available as your drawings or sample.
| Process | Die Forging | |
| Material | Stainless Steel, Carbon Steel, Alloy Steel | |
| Weight | 0.1Kg~20Kg | |
| Heat Treatment | Quenching, Annealing,Tempering,Normalizing, Quenching and Tempering | |
| Testing instrument | composition testing | Spectrometer, Metallographic microscope |
| Performance testing | Hardness tester, Tensile testing machine | |
| Size Measuring | CMM,Micrometer, Vernier Caliper, Depth Caliper, feeler gauge | |
| Thread Gauge , Height Gauge | ||
| Roughness | Ra1.6~Ra6.3 | |
| Machining Equipment | CNC Center , CNC Machines, Turning, Drilling, Milling, boring machine,Grinding Machines, | |
| Wire EDM,Laser Cutting&Welding, Plasma Cutting &Welding, EDM etc. | ||
| Quality control | Sampling inspection of raw materials and semi-finished products, 100% Inspection of finished products | |
| Surface Treatment | Shot Blast , Powder Coating, Polishing, Galvanized , Chrome Plated | |
| Production Capacity | 60000T / Years | |
| Lead Time | Normally 30 – 45 Days. | |
| Payment Terms | T/T , L/C | |
| Material Standard | ASTM , AISI , DIN , BS, JIS, GB, | |
| Certification | ISO9001:2008, IATF16949:2016 | |
2
Products Quality Control
Quality control involve the inspection and control of incoming materials, production processes, and finished products.
The quality control process includes,
1 First of all, the incoming raw materials with random sampling are analyzed by metallographic microscope to ensure that the chemical composition meets the production requirements
2 Then In the production process, there are QC staffs timely sampling ensure that the products are free of defects in the manufacturing process, and to coordinate and handle any abnormal quality issues may be occurred.
3 The final step of production process is magnetic particle flaw detector of the metal parts to detect it’s hidden crack or other defects.
4 All the finished metal parts is sampled in proportion and sent to the laboratory for various mechanical performance tests and size measurement, and the surface quality is manually 100% inspected.
The relevant testing equipment pictures are as following:
3
Quality Management System Control:
We strictly carry out system management accordance with iso9001 and ts16949 quality standards. And 5S lean production management is implemented on the production site.
The production management site as following:
4
Our Advantages:
1 We have a complete production process and equipment research and development capabilities for non-ferrous metal forming. Over 25 years of production experience of forging equipment and casting equipment make us own deep level understanding and operating of all equipments’ performance and running.
2 Our parent company, HiHangZhou Group, is a world-renowned high-end machinery manufacturing enterprise with more than 30 domestic subsidiaries and branches. The sales volume of 4 products ranks No1 nationwide and even worldwide, providing us with a strong technical and financial support.
3 One-third of over 300 staff are technical technical R&D members, ensuring the continuous technical innovation and the sustainable development of our company.
4 Our company implements the employee stock ownership system of company shares Increasing members’ sense of responsibility, creativity and work motivation.
5 The company is a model enterprise in the region of low-carbon environmental protection, and energy saving and emission reduction in reduction.
6 Unique company culture, and the regular rotation of individual work position give full play to the potential of talents and provide strong vitality for the development of the company.
7 Our Service:
A. Customized and Standard Manufacturing Service
B. A variety of Manufacturing Process Integration
C. Quality and Delivery Time Guaranteed
D. Effective Communication Ability
5
Company Culture
Our Vision
To become 1 of the leading companies
Our Mission
To become a platform for employees to realize their dream
To become 1 of the transforming and upgrading pacemaker of Chinese enterprises
To set the national brands with pride
Our Belief
Strive to build the company into an ideal platform for entrepreneurs to realize their self-worth and contribute to the society
Values
Improvement is innovation, everyone can innovate
innovation inspired and failures tolerated
6
FAQ
1.
Q: Are you a trading company or a manufacturer?
A: Obviously we are a manufacturer of forging products, casting products and also have a high level of machining capabilities.
2.
Q: What series products do your have?
A: We are mainly engaged in forming processing of non-ferrous metals, including processing by casting , forging and machining. As you know, such machinery parts can be observed in various industries of equipment manufacturing.
3
Q: Do you provide samples? is it free?
A: Yes, we commonly provide samples according to the traditional practice, but we also need customers to provide a freight pay-by-account number to show mutual sincerity of cooperation.
4
Q: Is OEM available?
A: Yes, OEM is available.
5
Q: What’s your quality guarantee?
A: We insist that the survival of the company should depend on the products quality continuous improvement, without which we cannot survive for long. We carry out strictly product quality control for every process from incoming materials, production process to finished products via advanced detection instrument and equipment. We also invite independent third parties to certify our quality and management systems. Till now we have passed ISO/TS16949 and SGS certification .
6
Q. How about the Packing?
A: We usually use the iron box, or wooden case, also it can be customized according to customer’s demands.
7
Q: What is your minimum order quantity?
A: Yes, we require all international orders to have an minimum order quantity. The quantity is up to the exact products feature or property such as the material, weight, construction etc.
8
Q: What is the lead time?
A: Generally our forging products and casting products need to make new dies or molds, the time of making new dies or molds and samples within 30-45 days, and the large batch production time within 30-45 days. it’s also according to the parts structural complexity and quantity.
9
Q: What kinds of payment methods do you accept?
A: You can make the payment by T/T or L/C. 30% deposit in advance, 70% balance against the copy of B/L.
How to Calculate Stiffness, Centering Force, Wear and Fatigue Failure of Spline Couplings
There are various types of spline couplings. These couplings have several important properties. These properties are: Stiffness, Involute splines, Misalignment, Wear and fatigue failure. To understand how these characteristics relate to spline couplings, read this article. It will give you the necessary knowledge to determine which type of coupling best suits your needs. Keeping in mind that spline couplings are usually spherical in shape, they are made of steel.
Involute splines
An effective side interference condition minimizes gear misalignment. When 2 splines are coupled with no spline misalignment, the maximum tensile root stress shifts to the left by 5 mm. A linear lead variation, which results from multiple connections along the length of the spline contact, increases the effective clearance or interference by a given percentage. This type of misalignment is undesirable for coupling high-speed equipment.
Involute splines are often used in gearboxes. These splines transmit high torque, and are better able to distribute load among multiple teeth throughout the coupling circumference. The involute profile and lead errors are related to the spacing between spline teeth and keyways. For coupling applications, industry practices use splines with 25 to 50-percent of spline teeth engaged. This load distribution is more uniform than that of conventional single-key couplings.
To determine the optimal tooth engagement for an involved spline coupling, Xiangzhen Xue and colleagues used a computer model to simulate the stress applied to the splines. The results from this study showed that a “permissible” Ruiz parameter should be used in coupling. By predicting the amount of wear and tear on a crowned spline, the researchers could accurately predict how much damage the components will sustain during the coupling process.
There are several ways to determine the optimal pressure angle for an involute spline. Involute splines are commonly measured using a pressure angle of 30 degrees. Similar to gears, involute splines are typically tested through a measurement over pins. This involves inserting specific-sized wires between gear teeth and measuring the distance between them. This method can tell whether the gear has a proper tooth profile.
The spline system shown in Figure 1 illustrates a vibration model. This simulation allows the user to understand how involute splines are used in coupling. The vibration model shows 4 concentrated mass blocks that represent the prime mover, the internal spline, and the load. It is important to note that the meshing deformation function represents the forces acting on these 3 components.
Stiffness of coupling
The calculation of stiffness of a spline coupling involves the measurement of its tooth engagement. In the following, we analyze the stiffness of a spline coupling with various types of teeth using 2 different methods. Direct inversion and blockwise inversion both reduce CPU time for stiffness calculation. However, they require evaluation submatrices. Here, we discuss the differences between these 2 methods.
The analytical model for spline couplings is derived in the second section. In the third section, the calculation process is explained in detail. We then validate this model against the FE method. Finally, we discuss the influence of stiffness nonlinearity on the rotor dynamics. Finally, we discuss the advantages and disadvantages of each method. We present a simple yet effective method for estimating the lateral stiffness of spline couplings.
The numerical calculation of the spline coupling is based on the semi-analytical spline load distribution model. This method involves refined contact grids and updating the compliance matrix at each iteration. Hence, it consumes significant computational time. Further, it is difficult to apply this method to the dynamic analysis of a rotor. This method has its own limitations and should be used only when the spline coupling is fully investigated.
The meshing force is the force generated by a misaligned spline coupling. It is related to the spline thickness and the transmitting torque of the rotor. The meshing force is also related to the dynamic vibration displacement. The result obtained from the meshing force analysis is given in Figures 7, 8, and 9.
The analysis presented in this paper aims to investigate the stiffness of spline couplings with a misaligned spline. Although the results of previous studies were accurate, some issues remained. For example, the misalignment of the spline may cause contact damages. The aim of this article is to investigate the problems associated with misaligned spline couplings and propose an analytical approach for estimating the contact pressure in a spline connection. We also compare our results to those obtained by pure numerical approaches.
Misalignment
To determine the centering force, the effective pressure angle must be known. Using the effective pressure angle, the centering force is calculated based on the maximum axial and radial loads and updated Dudley misalignment factors. The centering force is the maximum axial force that can be transmitted by friction. Several published misalignment factors are also included in the calculation. A new method is presented in this paper that considers the cam effect in the normal force.
In this new method, the stiffness along the spline joint can be integrated to obtain a global stiffness that is applicable to torsional vibration analysis. The stiffness of bearings can also be calculated at given levels of misalignment, allowing for accurate estimation of bearing dimensions. It is advisable to check the stiffness of bearings at all times to ensure that they are properly sized and aligned.
A misalignment in a spline coupling can result in wear or even failure. This is caused by an incorrectly aligned pitch profile. This problem is often overlooked, as the teeth are in contact throughout the involute profile. This causes the load to not be evenly distributed along the contact line. Consequently, it is important to consider the effect of misalignment on the contact force on the teeth of the spline coupling.
The centre of the male spline in Figure 2 is superposed on the female spline. The alignment meshing distances are also identical. Hence, the meshing force curves will change according to the dynamic vibration displacement. It is necessary to know the parameters of a spline coupling before implementing it. In this paper, the model for misalignment is presented for spline couplings and the related parameters.
Using a self-made spline coupling test rig, the effects of misalignment on a spline coupling are studied. In contrast to the typical spline coupling, misalignment in a spline coupling causes fretting wear at a specific position on the tooth surface. This is a leading cause of failure in these types of couplings.
Wear and fatigue failure
The failure of a spline coupling due to wear and fatigue is determined by the first occurrence of tooth wear and shaft misalignment. Standard design methods do not account for wear damage and assess the fatigue life with big approximations. Experimental investigations have been conducted to assess wear and fatigue damage in spline couplings. The tests were conducted on a dedicated test rig and special device connected to a standard fatigue machine. The working parameters such as torque, misalignment angle, and axial distance have been varied in order to measure fatigue damage. Over dimensioning has also been assessed.
During fatigue and wear, mechanical sliding takes place between the external and internal splines and results in catastrophic failure. The lack of literature on the wear and fatigue of spline couplings in aero-engines may be due to the lack of data on the coupling’s application. Wear and fatigue failure in splines depends on a number of factors, including the material pair, geometry, and lubrication conditions.
The analysis of spline couplings shows that over-dimensioning is common and leads to different damages in the system. Some of the major damages are wear, fretting, corrosion, and teeth fatigue. Noise problems have also been observed in industrial settings. However, it is difficult to evaluate the contact behavior of spline couplings, and numerical simulations are often hampered by the use of specific codes and the boundary element method.
The failure of a spline gear coupling was caused by fatigue, and the fracture initiated at the bottom corner radius of the keyway. The keyway and splines had been overloaded beyond their yield strength, and significant yielding was observed in the spline gear teeth. A fracture ring of non-standard alloy steel exhibited a sharp corner radius, which was a significant stress raiser.
Several components were studied to determine their life span. These components include the spline shaft, the sealing bolt, and the graphite ring. Each of these components has its own set of design parameters. However, there are similarities in the distributions of these components. Wear and fatigue failure of spline couplings can be attributed to a combination of the 3 factors. A failure mode is often defined as a non-linear distribution of stresses and strains.


