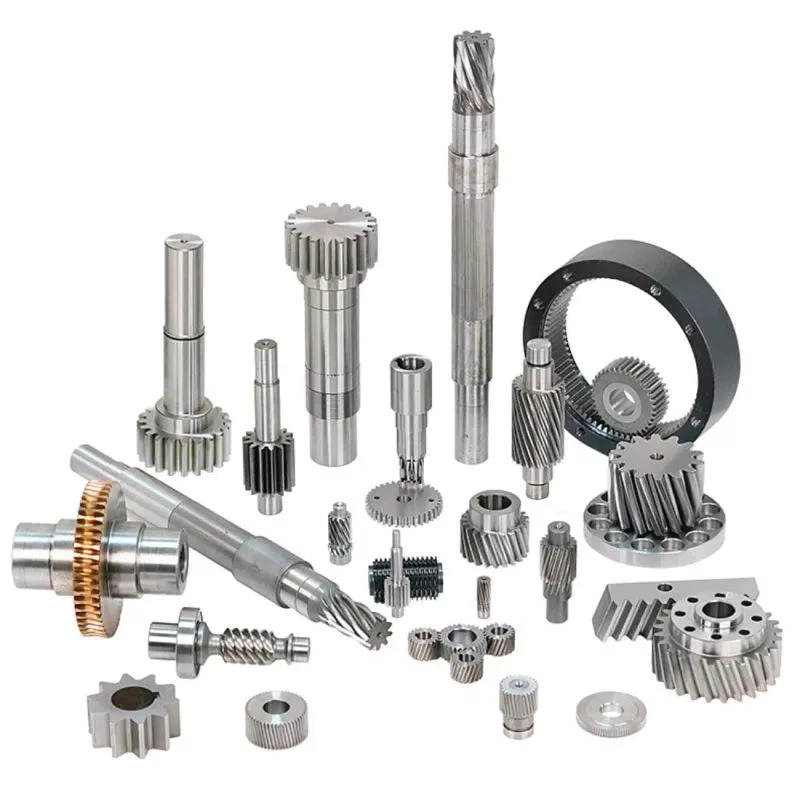
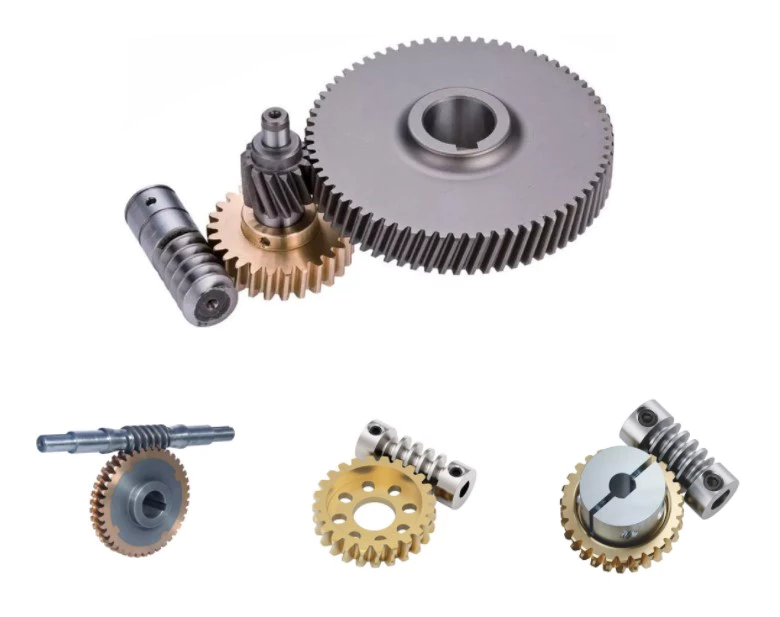
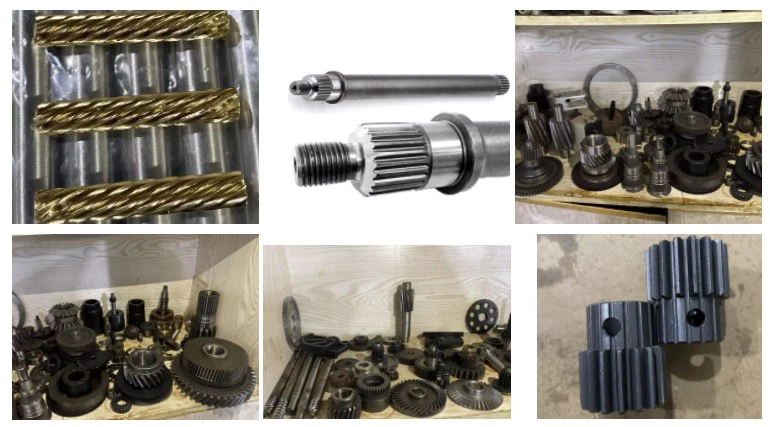
Product Description
1
Products
Name: Made in China CNC machining casting iron passenger vehicles spare parts drive axle wheel hub
Material: dectile iron
Weight: From .2kg-10kg
Packing: standard export packing
Min order: 100pcs
Customized production is available as your drawings or sample.
| Process | casting and CNC machining | |
| Material | Ductile ironl, Alloy Steel | |
| Weight | 0.1Kg~20Kg | |
| Heat Treatment | Quenching, Annealing,Tempering,Normalizing, Quenching and Tempering | |
| Testing instrument | composition testing | Spectrometer, Metallographic microscope |
| Performance testing | Hardness tester, Tensile testing machine | |
| Size Measuring | CMM,Micrometer, Vernier Caliper, Depth Caliper, feeler gauge | |
| Thread Gauge , Height Gauge | ||
| Roughness | Ra1.6~Ra6.3 | |
| Machining Equipment | CNC Center , CNC Machines, Turning, Drilling, Milling, boring machine,Grinding Machines, | |
| Wire EDM,Laser Cutting&Welding, Plasma Cutting &Welding, EDM etc. | ||
| Quality control | Sampling inspection of raw materials and semi-finished products, 100% Inspection of finished products | |
| Surface Treatment | Shot Blast , Powder Coating, Polishing, Galvanized , Chrome Plated | |
| Production Capacity | 60000T / Years | |
| Lead Time | Normally 30 – 45 Days. | |
| Payment Terms | T/T , L/C | |
| Material Standard | ASTM , AISI , DIN , BS, JIS, GB, | |
| Certification | ISO9001:2008, IATF16949:2016 | |
2
Products Quality Control
Quality control involve the inspection and control of incoming materials, production processes, and finished products.
The quality control process includes,
1 First of all, the incoming raw materials with random sampling are analyzed by metallographic microscope to ensure that the chemical composition meets the production requirements
2 Then In the production process, there are QC staffs timely sampling ensure that the products are free of defects in the manufacturing process, and to coordinate and handle any abnormal quality issues may be occurred.
3 The final step of production process is magnetic particle flaw detector of the metal parts to detect it’s hidden crack or other defects.
4 All the finished metal parts is sampled in proportion and sent to the laboratory for various mechanical performance tests and size measurement, and the surface quality is manually 100% inspected.
The relevant testing equipment pictures are as following:
3
Quality Management System Control:
We strictly carry out system management accordance with iso9001 and ts16949 quality standards. And 5S lean production management is implemented on the production site.
The production management site as following:
4
Our Advantages:
1 We have a complete production process and equipment research and development capabilities for non-ferrous metal forming. Over 25 years of production experience of forging equipment and casting equipment make us own deep level understanding and operating of all equipments’ performance and running.
2 Our parent company, HiHangZhou Group, is a world-renowned high-end machinery manufacturing enterprise with more than 30 domestic subsidiaries and branches. The sales volume of 4 products ranks No1 nationwide and even worldwide, providing us with a strong technical and financial support.
3 One-third of over 300 staff are technical technical R&D members, ensuring the continuous technical innovation and the sustainable development of our company.
4 Our company implements the employee stock ownership system of company shares Increasing members’ sense of responsibility, creativity and work motivation.
5 The company is a model enterprise in the region of low-carbon environmental protection, and energy saving and emission reduction in reduction.
6 Unique company culture, and the regular rotation of individual work position give full play to the potential of talents and provide strong vitality for the development of the company.
7 Our Service:
A. Customized and Standard Manufacturing Service
B. A variety of Manufacturing Process Integration
C. Quality and Delivery Time Guaranteed
D. Effective Communication Ability
5
Company Culture
Our Vision
To become 1 of the leading companies
Our Mission
To become a platform for employees to realize their dream
To become 1 of the transforming and upgrading pacemaker of Chinese enterprises
To set the national brands with pride
Our Belief
Strive to build the company into an ideal platform for entrepreneurs to realize their self-worth and contribute to the society
Values
Improvement is innovation, everyone can innovate
innovation inspired and failures tolerated
6
FAQ
1.
Q: Are you a trading company or a manufacturer?
A: Obviously we are a manufacturer of forging products, casting products and also have a high level of machining capabilities.
2.
Q: What series products do your have?
A: We are mainly engaged in forming processing of non-ferrous metals, including processing by casting , forging and machining. As you know, such machinery parts can be observed in various industries of equipment manufacturing.
3
Q: Do you provide samples? is it free?
A: Yes, we commonly provide samples according to the traditional practice, but we also need customers to provide a freight pay-by-account number to show mutual sincerity of cooperation.
4
Q: Is OEM available?
A: Yes, OEM is available.
5
Q: What’s your quality guarantee?
A: We insist that the survival of the company should depend on the products quality continuous improvement, without which we cannot survive for long. We carry out strictly product quality control for every process from incoming materials, production process to finished products via advanced detection instrument and equipment. We also invite independent third parties to certify our quality and management systems. Till now we have passed ISO/TS16949 and SGS certification .
6
Q. How about the Packing?
A: We usually use the iron box, or wooden case, also it can be customized according to customer’s demands.
7
Q: What is your minimum order quantity?
A: Yes, we require all international orders to have an minimum order quantity. The quantity is up to the exact products feature or property such as the material, weight, construction etc.
8
Q: What is the lead time?
A: Generally our forging products and casting products need to make new dies or molds, the time of making new dies or molds and samples within 30-45 days, and the large batch production time within 30-45 days. it’s also according to the parts structural complexity and quantity.
9
Q: What kinds of payment methods do you accept?
A: You can make the payment by T/T or L/C. 30% deposit in advance, 70% balance against the copy of B/L.
Calculating the Deflection of a Worm Shaft
In this article, we’ll discuss how to calculate the deflection of a worm gear’s worm shaft. We’ll also discuss the characteristics of a worm gear, including its tooth forces. And we’ll cover the important characteristics of a worm gear. Read on to learn more! Here are some things to consider before purchasing a worm gear. We hope you enjoy learning! After reading this article, you’ll be well-equipped to choose a worm gear to match your needs.
Calculation of worm shaft deflection
The main goal of the calculations is to determine the deflection of a worm. Worms are used to turn gears and mechanical devices. This type of transmission uses a worm. The worm diameter and the number of teeth are inputted into the calculation gradually. Then, a table with proper solutions is shown on the screen. After completing the table, you can then move on to the main calculation. You can change the strength parameters as well.
The maximum worm shaft deflection is calculated using the finite element method (FEM). The model has many parameters, including the size of the elements and boundary conditions. The results from these simulations are compared to the corresponding analytical values to calculate the maximum deflection. The result is a table that displays the maximum worm shaft deflection. The tables can be downloaded below. You can also find more information about the different deflection formulas and their applications.
The calculation method used by DIN EN 10084 is based on the hardened cemented worm of 16MnCr5. Then, you can use DIN EN 10084 (CuSn12Ni2-C-GZ) and DIN EN 1982 (CuAl10Fe5Ne5-C-GZ). Then, you can enter the worm face width, either manually or using the auto-suggest option.
Common methods for the calculation of worm shaft deflection provide a good approximation of deflection but do not account for geometric modifications on the worm. While Norgauer’s 2021 approach addresses these issues, it fails to account for the helical winding of the worm teeth and overestimates the stiffening effect of gearing. More sophisticated approaches are required for the efficient design of thin worm shafts.
Worm gears have a low noise and vibration compared to other types of mechanical devices. However, worm gears are often limited by the amount of wear that occurs on the softer worm wheel. Worm shaft deflection is a significant influencing factor for noise and wear. The calculation method for worm gear deflection is available in ISO/TR 14521, DIN 3996, and AGMA 6022.
The worm gear can be designed with a precise transmission ratio. The calculation involves dividing the transmission ratio between more stages in a gearbox. Power transmission input parameters affect the gearing properties, as well as the material of the worm/gear. To achieve a better efficiency, the worm/gear material should match the conditions that are to be experienced. The worm gear can be a self-locking transmission.
The worm gearbox contains several machine elements. The main contributors to the total power loss are the axial loads and bearing losses on the worm shaft. Hence, different bearing configurations are studied. One type includes locating/non-locating bearing arrangements. The other is tapered roller bearings. The worm gear drives are considered when locating versus non-locating bearings. The analysis of worm gear drives is also an investigation of the X-arrangement and four-point contact bearings.
Influence of tooth forces on bending stiffness of a worm gear
The bending stiffness of a worm gear is dependent on tooth forces. Tooth forces increase as the power density increases, but this also leads to increased worm shaft deflection. The resulting deflection can affect efficiency, wear load capacity, and NVH behavior. Continuous improvements in bronze materials, lubricants, and manufacturing quality have enabled worm gear manufacturers to produce increasingly high power densities.
Standardized calculation methods take into account the supporting effect of the toothing on the worm shaft. However, overhung worm gears are not included in the calculation. In addition, the toothing area is not taken into account unless the shaft is designed next to the worm gear. Similarly, the root diameter is treated as the equivalent bending diameter, but this ignores the supporting effect of the worm toothing.
A generalized formula is provided to estimate the STE contribution to vibratory excitation. The results are applicable to any gear with a meshing pattern. It is recommended that engineers test different meshing methods to obtain more accurate results. One way to test tooth-meshing surfaces is to use a finite element stress and mesh subprogram. This software will measure tooth-bending stresses under dynamic loads.
The effect of tooth-brushing and lubricant on bending stiffness can be achieved by increasing the pressure angle of the worm pair. This can reduce tooth bending stresses in the worm gear. A further method is to add a load-loaded tooth-contact analysis (CCTA). This is also used to analyze mismatched ZC1 worm drive. The results obtained with the technique have been widely applied to various types of gearing.
In this study, we found that the ring gear’s bending stiffness is highly influenced by the teeth. The chamfered root of the ring gear is larger than the slot width. Thus, the ring gear’s bending stiffness varies with its tooth width, which increases with the ring wall thickness. Furthermore, a variation in the ring wall thickness of the worm gear causes a greater deviation from the design specification.
To understand the impact of the teeth on the bending stiffness of a worm gear, it is important to know the root shape. Involute teeth are susceptible to bending stress and can break under extreme conditions. A tooth-breakage analysis can control this by determining the root shape and the bending stiffness. The optimization of the root shape directly on the final gear minimizes the bending stress in the involute teeth.
The influence of tooth forces on the bending stiffness of a worm gear was investigated using the CZPT Spiral Bevel Gear Test Facility. In this study, multiple teeth of a spiral bevel pinion were instrumented with strain gages and tested at speeds ranging from static to 14400 RPM. The tests were performed with power levels as high as 540 kW. The results obtained were compared with the analysis of a three-dimensional finite element model.
Characteristics of worm gears
Worm gears are unique types of gears. They feature a variety of characteristics and applications. This article will examine the characteristics and benefits of worm gears. Then, we’ll examine the common applications of worm gears. Let’s take a look! Before we dive in to worm gears, let’s review their capabilities. Hopefully, you’ll see how versatile these gears are.
A worm gear can achieve massive reduction ratios with little effort. By adding circumference to the wheel, the worm can greatly increase its torque and decrease its speed. Conventional gearsets require multiple reductions to achieve the same reduction ratio. Worm gears have fewer moving parts, so there are fewer places for failure. However, they can’t reverse the direction of power. This is because the friction between the worm and wheel makes it impossible to move the worm backwards.
Worm gears are widely used in elevators, hoists, and lifts. They are particularly useful in applications where stopping speed is critical. They can be incorporated with smaller brakes to ensure safety, but shouldn’t be relied upon as a primary braking system. Generally, they are self-locking, so they are a good choice for many applications. They also have many benefits, including increased efficiency and safety.
Worm gears are designed to achieve a specific reduction ratio. They are typically arranged between the input and output shafts of a motor and a load. The 2 shafts are often positioned at an angle that ensures proper alignment. Worm gear gears have a center spacing of a frame size. The center spacing of the gear and worm shaft determines the axial pitch. For instance, if the gearsets are set at a radial distance, a smaller outer diameter is necessary.
Worm gears’ sliding contact reduces efficiency. But it also ensures quiet operation. The sliding action limits the efficiency of worm gears to 30% to 50%. A few techniques are introduced herein to minimize friction and to produce good entrance and exit gaps. You’ll soon see why they’re such a versatile choice for your needs! So, if you’re considering purchasing a worm gear, make sure you read this article to learn more about its characteristics!
An embodiment of a worm gear is described in FIGS. 19 and 20. An alternate embodiment of the system uses a single motor and a single worm 153. The worm 153 turns a gear which drives an arm 152. The arm 152, in turn, moves the lens/mirr assembly 10 by varying the elevation angle. The motor control unit 114 then tracks the elevation angle of the lens/mirr assembly 10 in relation to the reference position.
The worm wheel and worm are both made of metal. However, the brass worm and wheel are made of brass, which is a yellow metal. Their lubricant selections are more flexible, but they’re limited by additive restrictions due to their yellow metal. Plastic on metal worm gears are generally found in light load applications. The lubricant used depends on the type of plastic, as many types of plastics react to hydrocarbons found in regular lubricant. For this reason, you need a non-reactive lubricant.

